Creating AR Scenes with Historic Imagery and 3DStreet's Viewer Mode

May 2026 Update: The image hosting step in this post (uploading to GitHub Pages or another web host) is no longer required. 3DStreet now supports built-in custom image upload — drag your panoramic or historic image directly into the editor and it is stored in your account automatically. The rest of the AR workflow below still applies. See the updated docs on adding custom images.
Ever wondered what your neighborhood looked like 100 years ago? With 3DStreet's enhanced AR capabilities and AI tools like World Labs, you can now create immersive augmented reality experiences that let people walk through history. I recently used this workflow to create AR scenes of historic San Francisco for a Green Density walking tour, allowing participants to toggle between past and present views of the same location.
What You'll Create
This tutorial will walk you through the complete process I used to create AR experiences for my Green Density walking tour, where participants could scan QR codes and see how San Francisco's landscape has evolved over time.
By the end of this tutorial, you'll have:
- Transformed historic photos into 360° panoramic scenes using World Labs
- Created geospatially-positioned AR scenes in 3DStreet
- Generated QR codes for easy sharing with tour participants
- Built an engaging community experience that brings history to life
Step 1: Find and Prepare Your Historic Photo
Start by finding a historic photograph of your location. In this case I used a photo from early 1900s that I found on a local San Francisco history website.
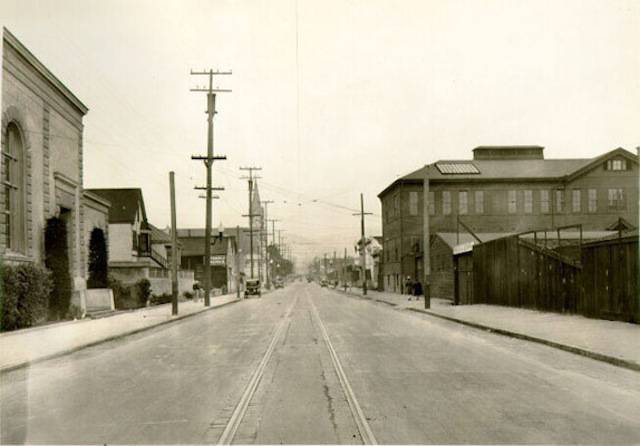
This is a 1931 photo from San Francisco's Mission district looking west at a newly constructed street with streetcar rails and a new below ground combined sewer system.
Sometimes, your historic photo may need improvement. Here's another photo of the same area 50 years earlier in 1882. The visual quality is much poorer and we'll need to do some work to improve it.
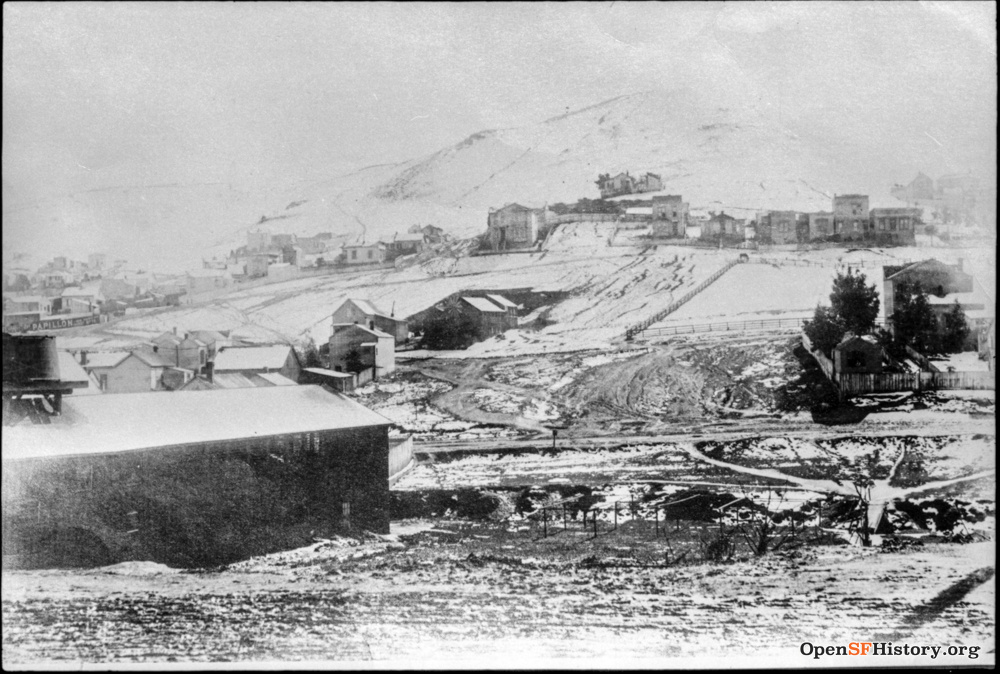
This is an 1882 photo looking south toward Bernal Heights with a footbridge over Pecita Creek visible on the lower right.
Enhancing Source Image Quality (Optional)
These days there's more than just Photoshop with new AI-powered options to restore source images.
Option 1: Flux Kontext Pro
As covered in a recent blog post tutorial, I strongly recommend the Black Forest Labs Flux Kontext Pro model for AI powered image editing that retains original geometric dimensions. This is perfect for a case like this where we want to retain topography and structure geometry but reshade nearly everything.
Option 2: Flux Inpainting (Fill)
- Use tools like the Fill or Inpainting function in Black Forest Labs playground to edit specific areas
- Great for replacing empty areas with historically accurate details
- I used this to better illustrate the historic Precita Creek area
Option 3: OpenAI GPT Image Model
ChatGPT has image-to-image editing features that create high quality outputs, but the model does not retain accurate geometric information from the source image. This is fine for artistic interpretation -- while it has high quality output, it comes at the expense of frequent hallucination
My Enhanced Precita Creek (Flat) Image
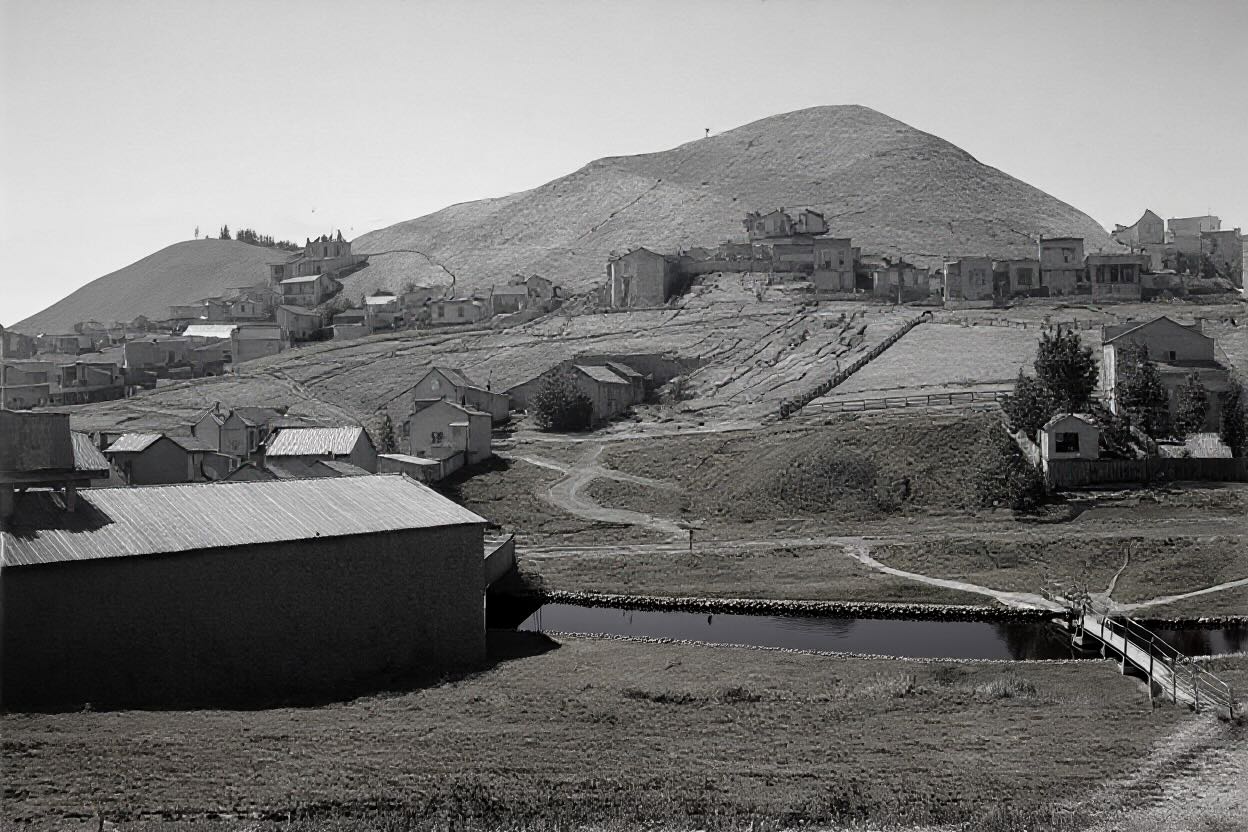
This is the enhanced version of the 1882 photo that has deeper topography shading and a fill-generated creek featuring reflective water along the original gulch path from the source image.
Step 2: Create a 360° Scene with World Labs
Once you have your enhanced historic photo, it's time to create a full panoramic environment.
- Import to World Labs: Upload your modified photo to World Labs (early access required)
- Generate 3D Scene: The AI will expand your 2D image into a full 360° environment
- Export Panoramic Image: Download the resulting equirectangular (panoramic) image
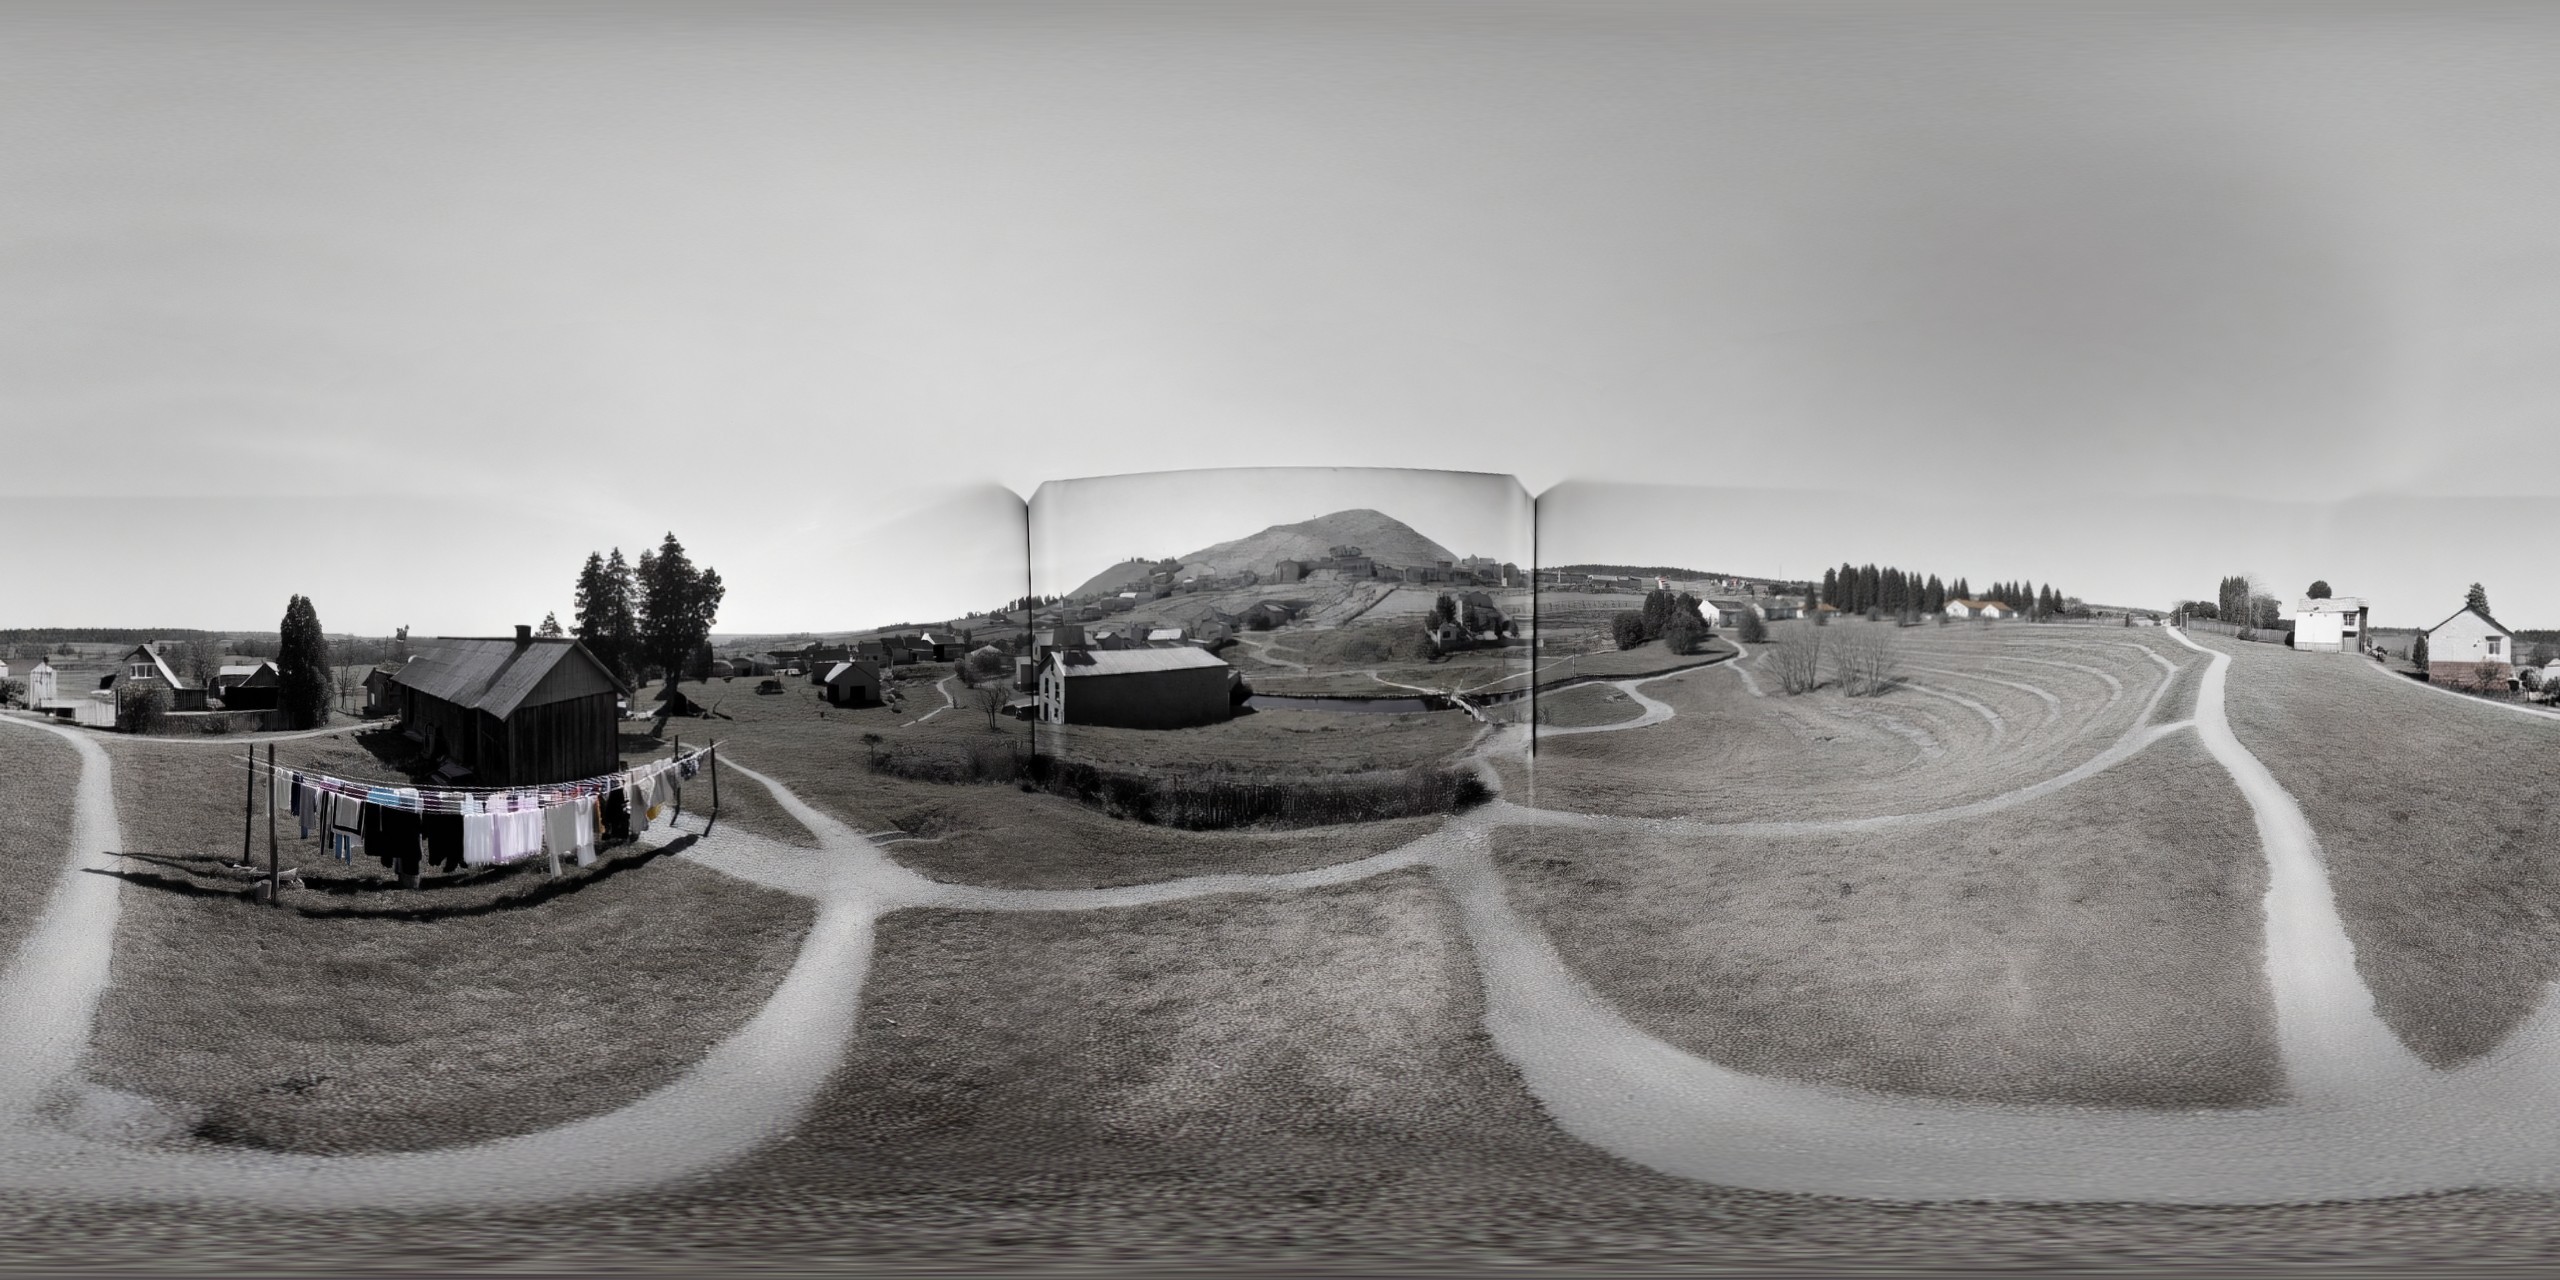 This is the output after importing the 2D image and generating the 3D scene using World Labs, then exported as a panoramic 360º equirectangular projected image.
Panoramic Image Enhancement for Topography Matching
The newly generated panoramic image won't be perfect -- the AI will not be able to match actual topography for the outpainted areas. Luckily, World Labs has a tool for panoramic inpainting that makes it much easier to target specific areas of the horizon to modify the topography to match the actual land area in the location of your historic photo.
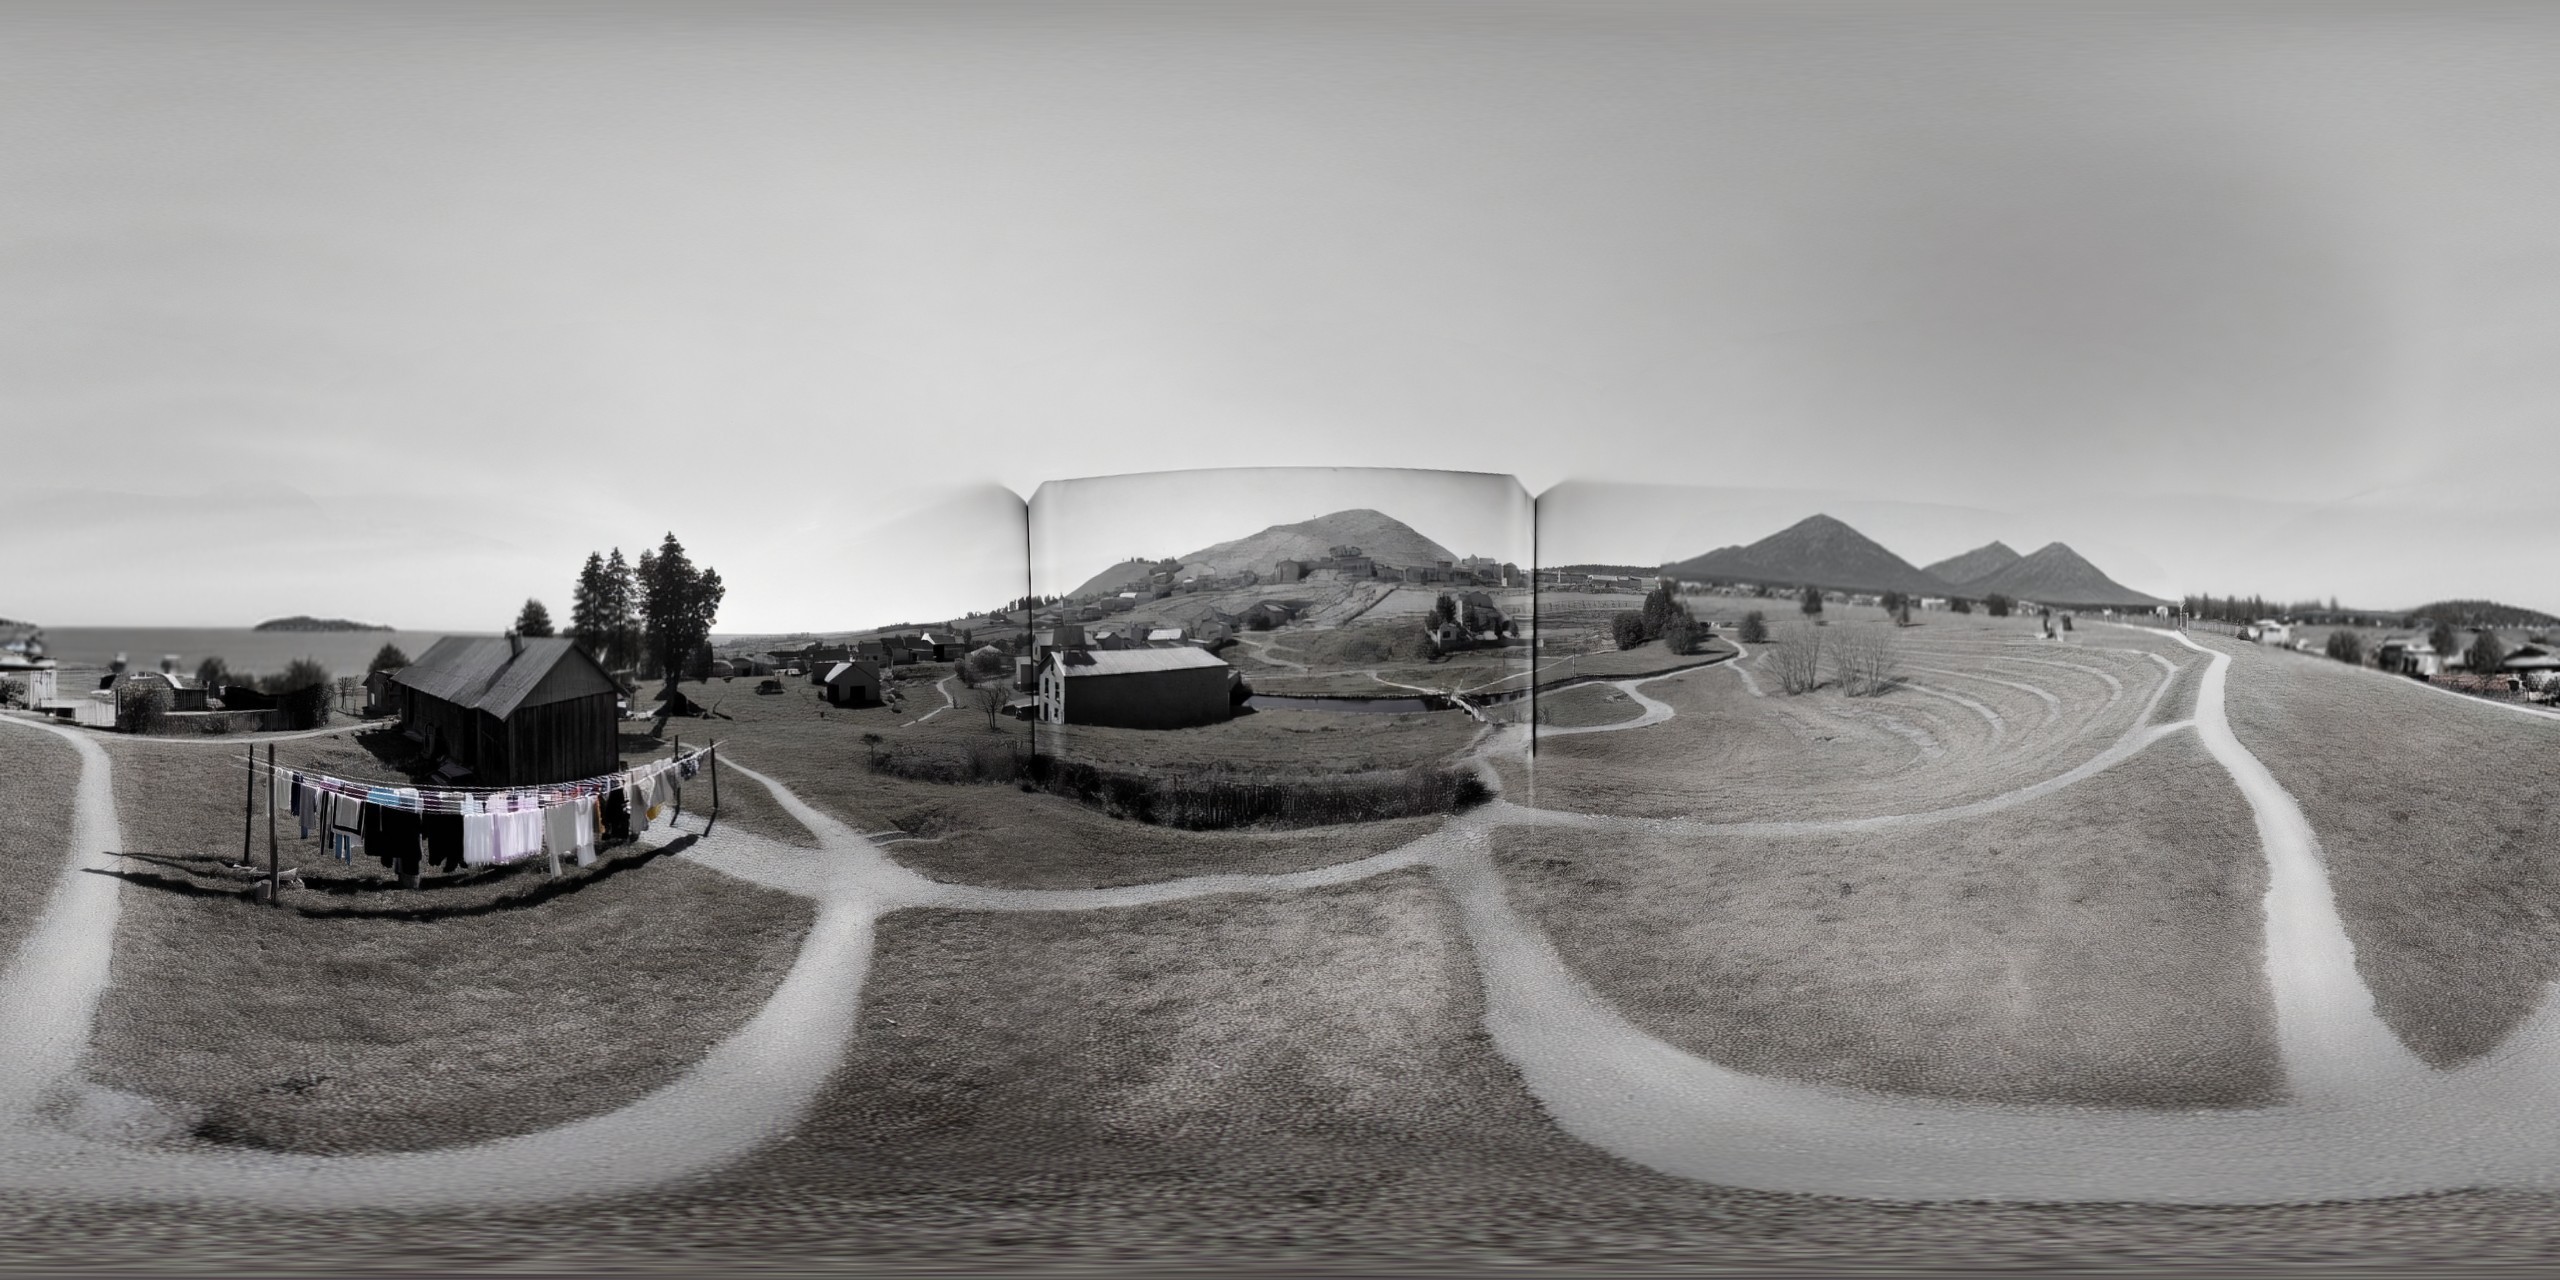 This panoramic image has been modified with World Labs inpainting to add hills in the rough location of Twin Peaks as well as the distant bay and a small island representing Yerba Buena.
Step 3: Host Your Panoramic Image
You'll need your panoramic image(s) to be publicly accessible via URL:
- Upload to GitHub Pages: Create a new repository and upload your image
- Alternative Hosting: Use any publicly accessible web hosting service
- Get Direct URL: Copy the direct link to your image file
I created a GitHub repository for these AR source and output materials.
Step 4: Create Your 3DStreet AR Scene
Now comes the exciting part - building your AR scene in 3DStreet.
You can also Clone an existing 3DStreet scene that already has the below configuration and simply replace the location and image Src values. Here is a known-working panoramic AR 3DStreet project that you can Save as... to modify for your own project.
Setting Up the Basic Scene
- Create New Scene: Start a new project in 3DStreet
- Set Geospatial Location:
- Click the location icon and enter the real-world coordinates
- This anchors your AR experience to the physical location
Adding the Panoramic Skybox
-
Add Custom Geometry:
- Start by adding a circle geometry
- Click "Advanced" and change geometry type to "sphere"
- Change the Radius value to
150
-
Apply Your Historic Image:
- With this custom geometry selected, in "Advanced" section
- Open the Materials tab
- Select the
Srcvalue and replace with the URL of your panoramic image - Press enter
- Change
Shadertoflat - Change
Sidetoback - Scroll back up to the common controls and change
Scalexvalue to -1
-
Adjust Orientation:
- Fine-tune the Y rotation to align the view correctly
- Use the red axis of orientation indicator in the center of your scene to identify North
Configure AR Viewer Mode
- Select Viewer Mode: Click
Viewerlayer and fineModein the right sidepanel - Enable WebXR-AR: Set the viewer
Modetowebxr-ar - iOS Support: Enable iOS support (requires 3DStreet Pro plan)
- Generate QR Code: Click to generate and download the QR code (You must save or Save as... your scene to generate a QR code)
Step 5: Test Your AR Experience
Before sharing with others, thoroughly test your AR scene:
- Visit the Location: Go to the physical location where your scene is anchored
- Start Recording: Use your device's built-in screen recording
- Scan QR Code: Use your phone's camera to scan the code
- Launch AR: Follow the prompts to open the AR experience
- Orient Yourself: Face the correct direction (typically west for my examples)
- Activate Scene: Click the play button to begin the AR experience
- Toggle Visibility: Use the eye icon to fade the historic scene in and out
Step 6: Prepare for Community Engagement
Print Materials
- QR Codes: Print multiple copies of your QR codes
- Map Integration: Include codes on tour maps or information sheets
- Instructions: Provide simple step-by-step instructions for participants
Day-of-Event Tips
- Multiple Copies: Bring plenty of printed QR codes
- Backup Device: Have a dedicated device ready to demonstrate
- Quick Demo: Practice a 20-second demo for hesitant participants
- Troubleshooting: Be prepared to help with QR code scanning issues
Real-World Results
During my Green Density walking tour, I tested three historic locations:
- Cesar Chavez (1931) Showing early rails and paved surfaces over buried Precita Creek
- 26th and Folsom (late 1800s): Revealing the original Precita Creek before it was buried
- Dolores Park: Displaying the original marshland and watershed view toward the East Bay
The experience was powerful - participants could literally see how San Francisco's landscape and housing density have evolved over time. Most people needed less than 20 seconds to see the full experience, making it perfect to illustrate a stop on a walking tour.
Try it Out!
Here is a copy of the map that we used that included QR code mapped to the specific locations of the source images.
Click the map to enlarge. You can print it out and go to the physical locations if you're in San Francisco, or just scan the QR codes to see what the views look like. After scanning the QR and loading the page, when you press the play button the default orientation is assumed to be facing West.

Device Compatibility
- Android: Works with modern devices using Chrome or Edge browsers that support WebXR
- iOS: Available through enhanced compatibility features for Pro subscribers, using Variant Launch as a polyfill for iOS.
Tips for Success
- Start Simple: Begin with one location before scaling to multiple sites
- Test Early: Visit the location and test the AR experience before your event
- Backup Plans: Have printed photos as fallbacks if technology fails
- Engage Participants: Encourage people to share their reactions and discoveries
Wrapping Up
Creating AR experiences with historic imagery opens up incredible opportunities for community engagement and education. By combining AI-enhanced historic photos, World Labs' 360° generation, and 3DStreet's AR viewer mode, you can create experiences that truly bring the past to life.
This workflow bridges the gap between historical preservation and modern technology, creating memorable experiences that help people understand how their neighborhoods have changed over time. Whether you're planning a community walking tour, creating educational content, or simply exploring local history, these tools make it easier than ever to share the stories embedded in our urban landscapes.
Ready to create your own historic AR experience? Start by finding a compelling photo from your area's past, and let technology help you bring that history into the present.